Details of making an almost perfect Dipole for receiving Space RADAR Signals at 220 MHz.
The Modified Dipole mounted on the Antenna Mast. This is the finished assembly mounted at the focus point or Second Element position of the Antenna.
Start with a 4x4 inch outdoor-rated plastic Electrical Box from your Home Store. Drill 4 holes, three elongated as shown (2 on one side, 1 on the other), with a 1/4 inch bit, the 4th a 3/8 inch bit for the "F" connector Barrel (shown later). Make sure the holes for the ROMEX Wire is as close to the bottom of the Box but spaced around 1/4 inch from the back of the box.
Notice the "F" connector Barrel mounted in the opposite end of the Box drilled with 3/8 Inch bit. Also notice how the three ROMEX holes are spaced.
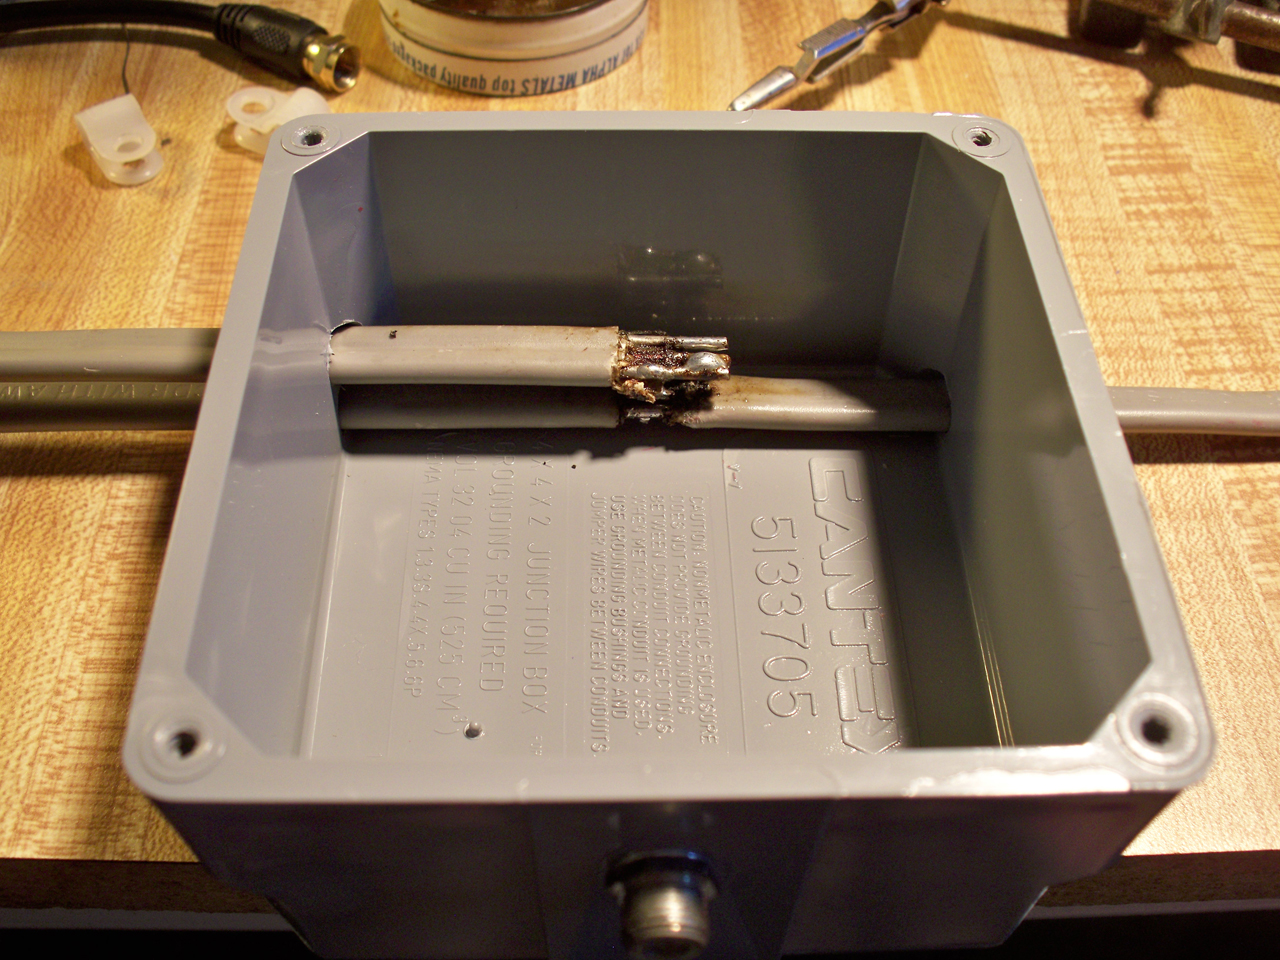
Warning: Do Not Use Acid-Core Solder. Use copious amounts of resin flux. Take a 39 inch piece of three conductor Outdoor-Rated (Gray) #12 ROMEX and bend it with a gentle curve at about 25 inches. Do not sharply crease the wire, even though, the bend should be rather flat. Carefully flatten the ROMEX, make it as geometrically straight as possible. This creates a slightly overlapping Modified Dipole. Strip the insulation down to the copper in the middle of the long piece, and the end of the short piece as shown below. Pre-Tin the exposed Copper with a medium Wattage Solder Iron making sure not to overheat, the insulation will swell and become difficult to insert through the holes in the Box.
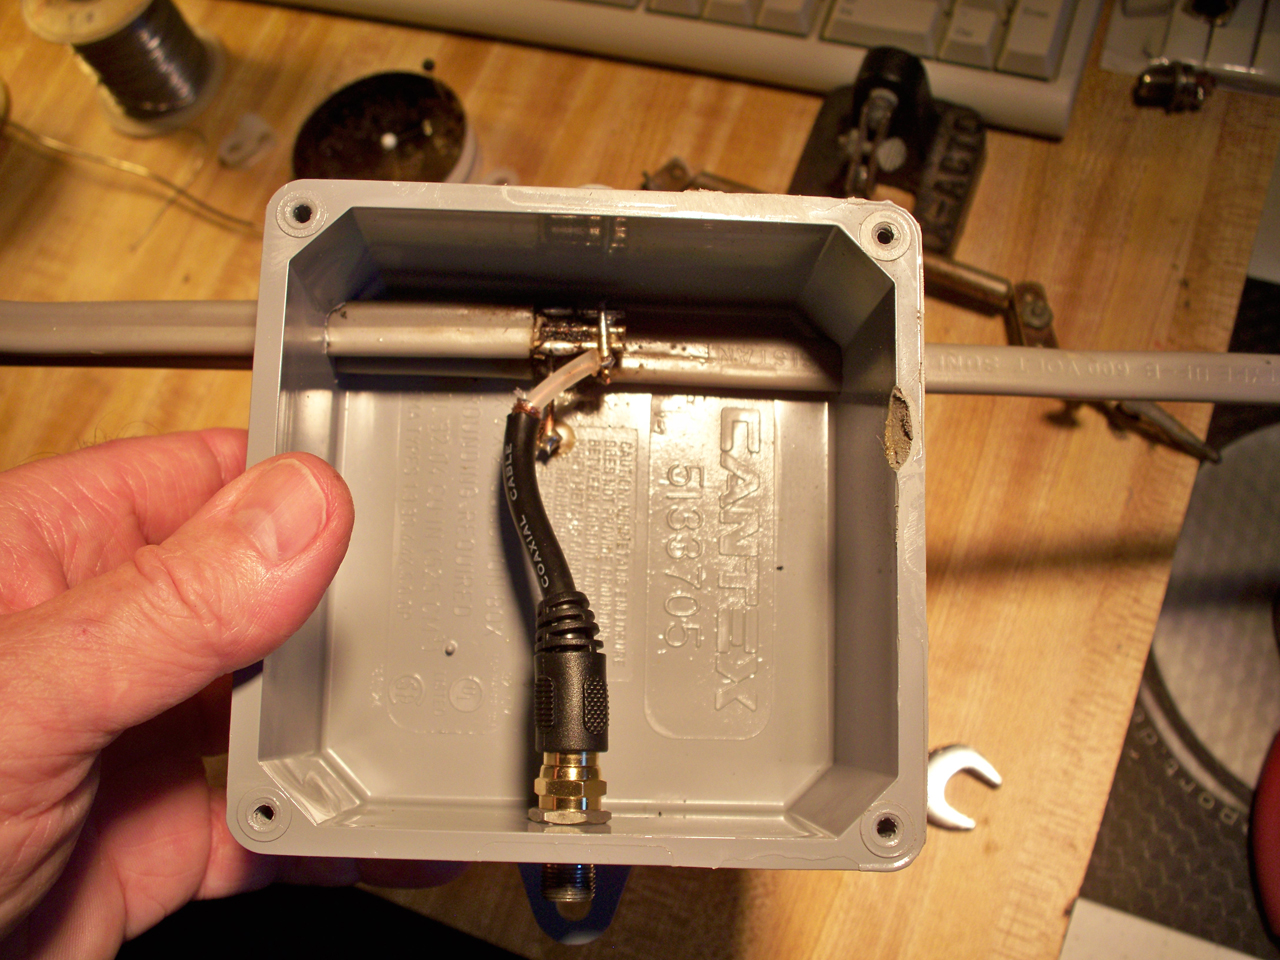
Insert the Pre-Tined ROMEX into the Box.
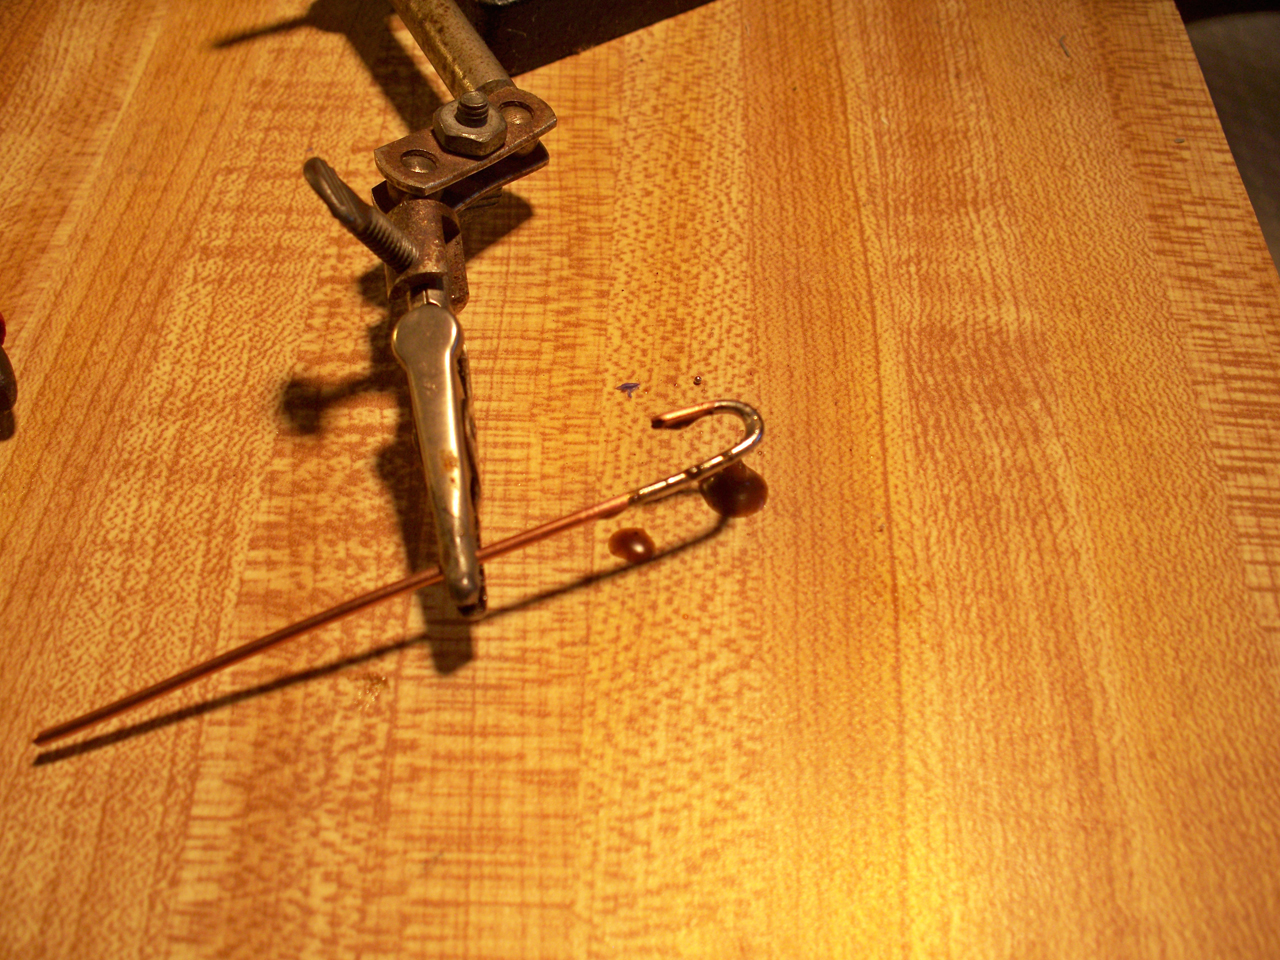
Pre-Tin 2 4-inch pieces of #14 solid copper wire
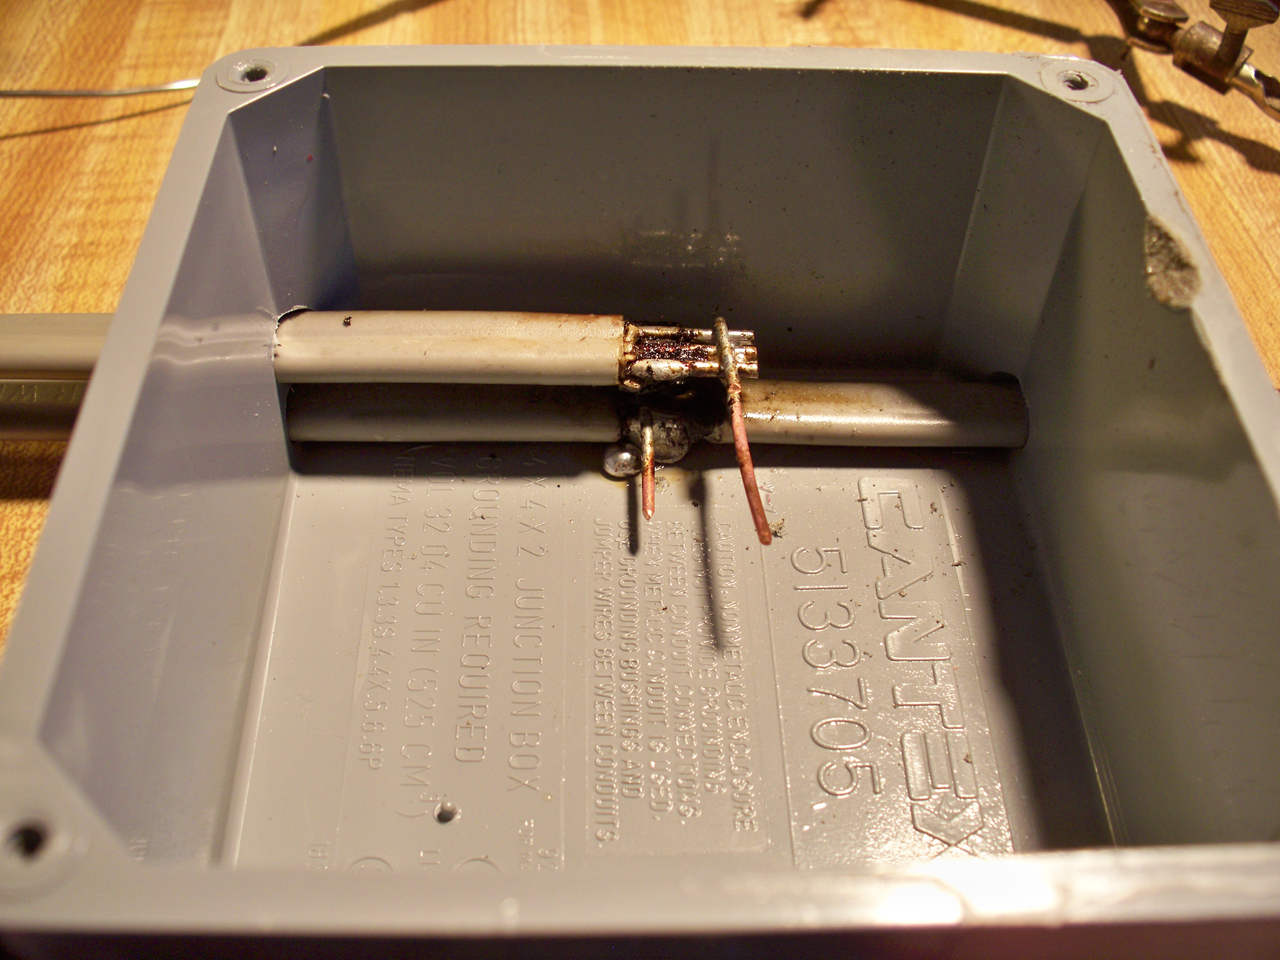
With the Medium Wattage Solder Iron solder the 2 Pre-Tinned Copper Hooks to the exposed ROMEX Copper as shown. Make sure all 3 conductors of upper and lower segment are firmly soldered to the Bare Copper Hooks.
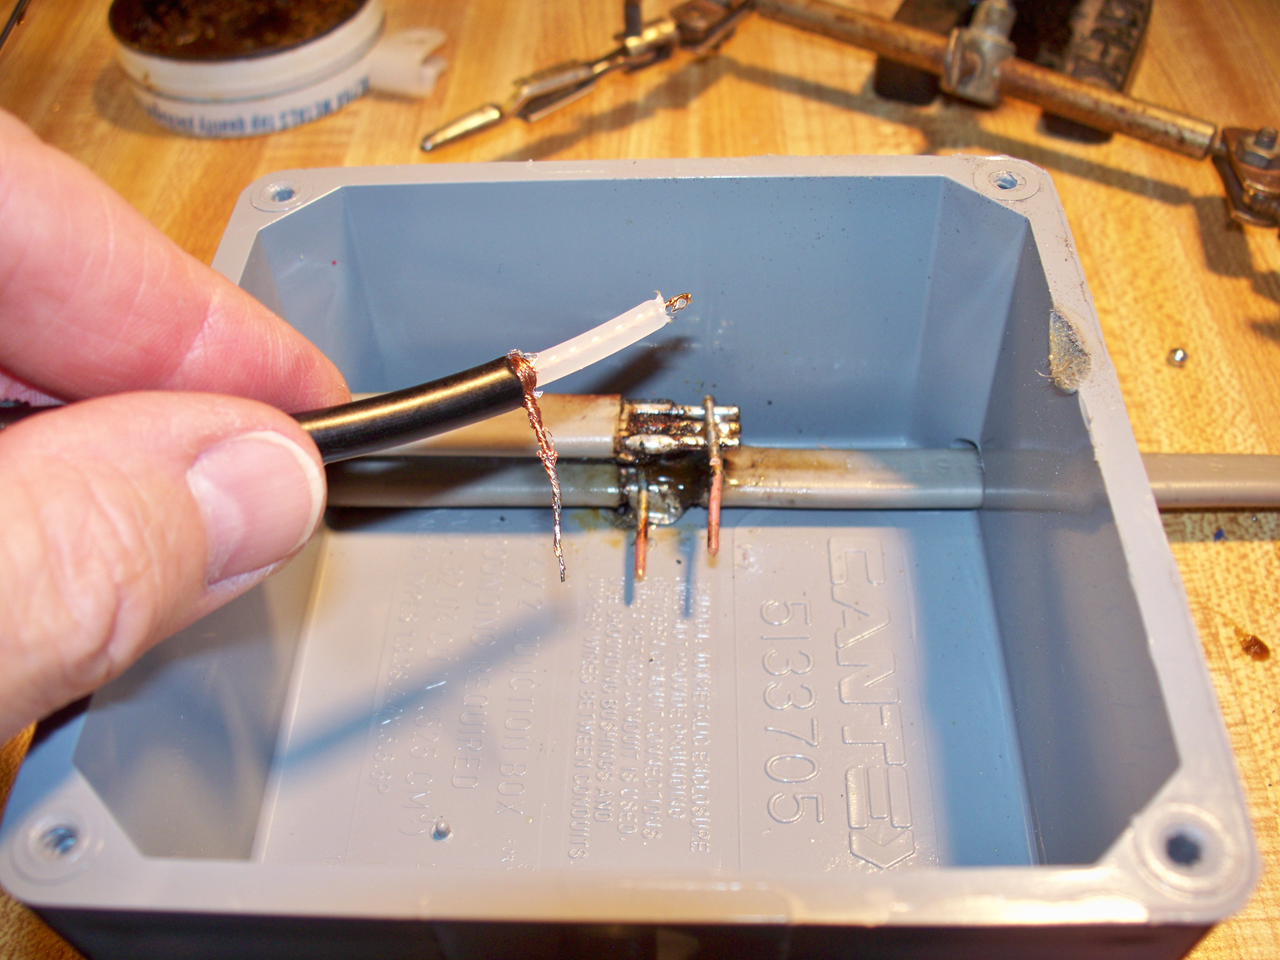
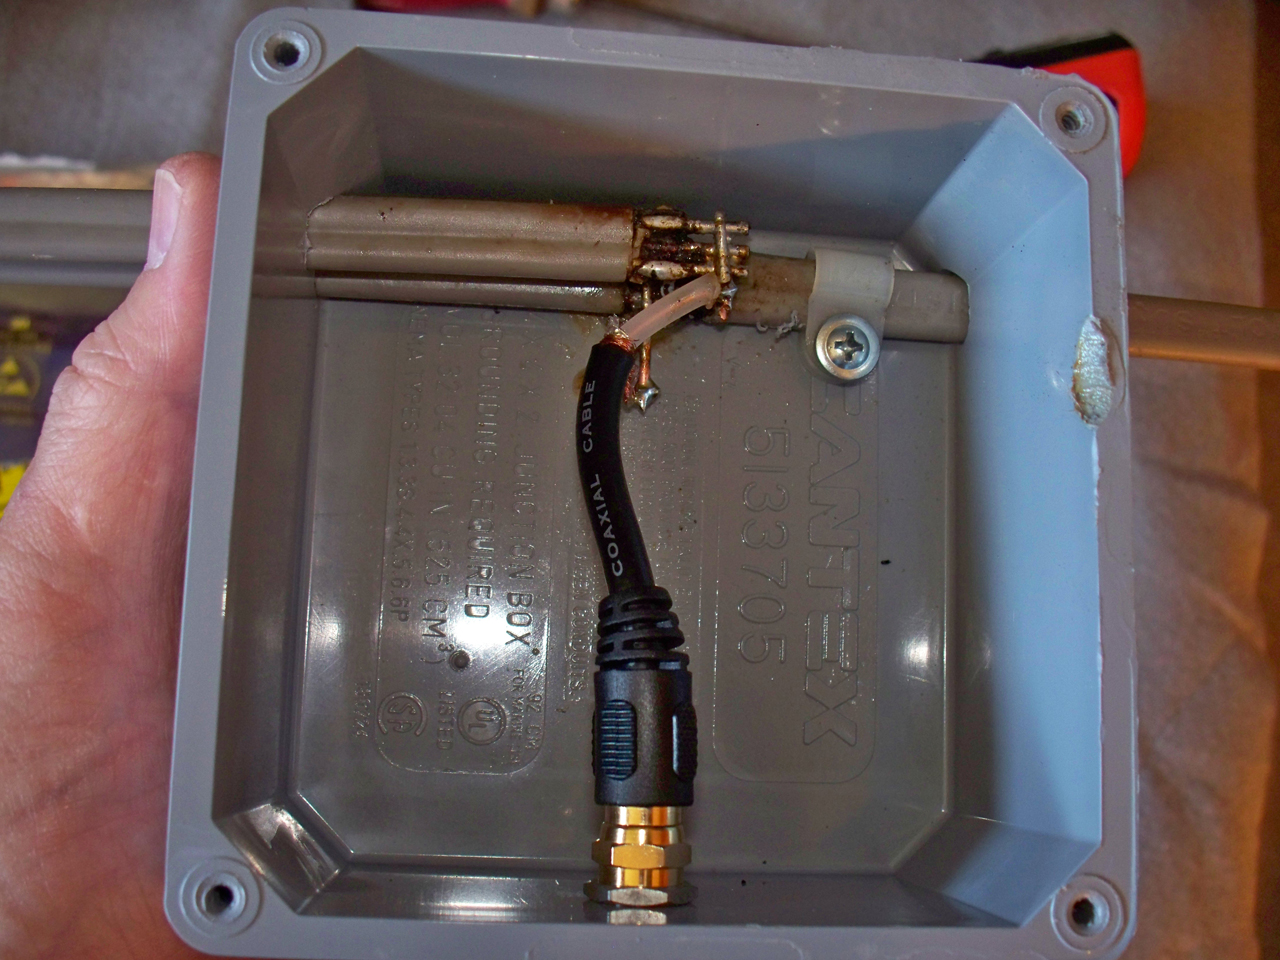
Obtain an "F" connector jumper cable with copper shielding. Copper Shielding is required so it may be soldered to the Dipole. Cut the Coax jumper, not too short and not too long, it must fit between the Dipole and the "F" Connector Barrel. Bend the center conductor of the Coax into a hook and pre-tin. Twist the Copper Shield into a Pigtail and pre-tin it. Cut off the excess #14 solid copper leads, the extra length was to facilitate soldering.
Screw on the "F" Connector to the Barrel. Use an Open-End Wrench to tighten but not too tight.
Drill a small hole and secure the ROMEX with a tie down clamp to prevent the ROMEX from moving. Smooth the top of the Box with a flat file to remove any unevenness in the lid of the box like the damage I inflected with the solder iron..
Before closing the Box seal any remaining holes, inside and out, around the ROMEX with PVC Cement. Since the Box is PVC, the Cement will soften the area around the ROMEX and help seal the box from moisture and insects. After applying the Cement, let it stand open in the air an hour allowing the Cement to harden. Notice in the image below there is light falling evenly under the ROMEX indicating it is relatively flat, straight, and perpendicular. Finished. Mount it on the Antenna Mast. Use a small amount of Vaseline on the "F" Connectors to repel water.